I was planning on taking what I liked most about each shirt and combining them to make one super awesome shirt.
So, yesterday I went to the Dollar Store to look for two shirts I could reconstruct. After looking for a few minutes and not finding anything that jumped out at me, I decided to go to Walmart. Within a few minutes I found a cute v neck heather blue shirt. The only problem was the biggest size they had was XL. I was thinking I was going to need an XL for the actual shirt and something bigger for the ruffles. So, I continued to look around to try and find another shirt that had the sizes I would need in a color I would like. After grazing the women's section for another 30 minutes, I went back to the blue shirt and wearily grabbed two of the XL shirts. Once I got back home I immediately dug into my reconstruction. I took one of the shirts and cut it down the front in the center (this was going to be the main shirt). On the other shirt I cut it down the side seams to separate the front of the shirt from the back of the shirt.
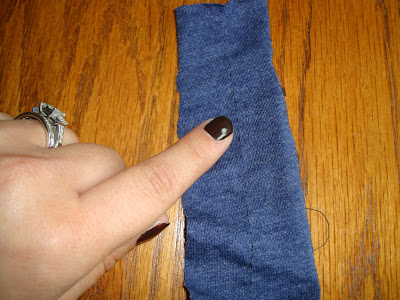
Then once I had the front and back separated, I cut, as closely as possible, about 2" strips vertically down the front of the shirt. And with the back of the shirt, I cut the pieces for the bustle horizontally. I made mine about 3 1/2" I wanted to have 3-4 bustles.
Once the front side of the shirt is cut into strips, I sewed vertically up the center of each strip using the loosest straight stitch. The reason I did a loose stitch was to make sure I can pull one of the pieces of threads to scrunch up the material. Also, if your sewing machine has a stretch option make sure that is off! On my first strip I was not paying attention and ruined it because I could not make the fabric scrunch.
Once I had all of my vertical pieces sewed and ruffled I pinned them to the front of my shirt along the seam that I cut open. Then I sewed them to the shirt trying to keep my stitch down the original stitch I did to ruffle the fabric.
When I got to the end of a strip and the beginning of another strip, I hand sewed the two pieces together. This was an optional step that I thought would make the ruffles seem more complete.
Once I had sewn as many ruffles that I could get around the newly cut seam and the neck I started to work on the bustle. I took my three pieces of fabric from the back side of the cut up shirt and sewed each of them with a loose straight stitch along the top of the fabric and once again pulled on one of the strings to make a slight ruffle along the top of the fabric.
Once I had all three pieces ruffled. I pinned them to the back of the shirt. I wanted them to be a little bit longer than the actual shirt so I sewed the first piece behind and under the actual shirt
After the first bustle, I continued to sew the other two above the original bottom seam of the shirt.
I was going to stop right there, but I decided the shirt needed some pockets. So, I cut a template out of a piece of cardboard and cut out the fabric for my two pockets from the left over fabric from the back of the cut up shirt.
 | |
| yeah...looks funny! |
So, here is the finished piece. I will say that I really like this shirt. I would definitely like it more if I used a larger shirt to cut up! Also, I think I will go with a bigger main shirt to make it longer. Especially if I do a bustle the next time. The only reason I say that is because the bustle on this shirt makes it pucker a little bit in the back. But, like I said I do really like this shirt. Plus as you can see in the last picture I added the little clasps that are on bras to hold the front together if I want the shirt closed. Also, I think I am going to weave white ribbon on the pockets to add a little something else to it. What do you all think?
 |
| this actually lays really cute once I ironed it. |
 | |
| here you can tell I added clasps to close the shirt |


No comments:
Post a Comment