My friend and I are extreme Harry Potter fans! Yes, my name is Misty and I love Harry Potter. So, that being said....the final movie is coming out and for those of you who are HP fans you understand the excitement and the sadness. So, we decided we had to make our own HP shirts for this final movie. After researching the different photo transfer paper to get, we set out to find shirts. We both wanted to have black shirts, so I purchased photo transfer paper for dark fabrics. Here is a link if you are interested in purchasing it too. My plan was to reconstruct a plan black shirt into something not so plan. Here is what I wanted my shirt to look like before we transfered our HP pictures onto them.
I love the braided effect and I was only planning on having a small quote of the front and a picture on the back. So, I figured there would be enough room for them. Well, I'm not going to get into that shirt right now other than the fact that it was a big fail. I only did the front so far and I was not liking it at all. It puckered in weird spots. I will definitely post the shirt at a different time. And I plan on going back to try to fix it. But for now, I still needed a shirt for my HP shirt. So, I decided to use a regular v-neck shirt and put the transfer photos on it first then add fabric flowers on the collar.
I didn't take any before pictures, but it was just a plain black v-neck shirt. The first step was to find a quote that we liked. I went online and search for Deathly Hallows quotes and quickly found what I wanted. Then, I searched for Deathly Hallows images. Once I knew what I wanted, I simply followed the instructions and printed the images onto the transfer paper and let it dry. Once dried, I cut the image and quote out the way I wanted it. Then, I peeled off the backing and stuck it onto the shirt where I wanted it and put the rice paper (that comes with the transfer paper) over the transfer and ironed on the hottest heat for 2 minutes. And viola it was done.
Follow me as I try to find a craftier, artsy, stylish and more creative me! "An artist is nothing without his or her obsessions, and I have mine. " Andres Serrano
Sunday, June 26, 2011
Thursday, June 23, 2011
Can you hear me now?
I would just like to say that I am not getting anything for this post, no money and no gadgets...nothing. Unless, they decided to all of a sudden sponsor me. Yeah, not so much. Anyway, let me give you a background story on this. I live 30 minutes from the closest town and I'm not sure how far away I live from the closest cell phone tower. So, needless to say my husband and I did not use our cell phones in our house. And if we did it was in select areas of the house in the most uncomfortable position. Go ahead and imagine me scrunched up in the bottom of our closet trying to talk on the phone during the winter because it was too cold to go outside and stand by the road where I know we have service. Or every time I send a text, I would have to walk outside for it to send. And we have tried almost every carrier out there to see if we could get better service. No such luck....we had the same problem with all of the carriers. It was very annoying. We definitely were not going to be one of those families that could save money by getting rid of their land line.
Until Tuesday. My husband came home from work with the biggest smile on his face and a box in his hands.
After prying the box out of his hands, I found out that is was something called a MicroCell from AT&T.
So, of course I asked him what it was and how much it cost (since I have not been working we have been really trying to spend our money on only the essentials). After finding out that the gadget was $199, I immediately freaked requested him to return the item. But, after he explained what it does I asked him if we could return it if it didn't work.
So, are you curious about what the magic box does. Well, here it is. It connects to your broadband Internet service to create a strong, secure, sharable 3G signal in your home. Up to four AT&T 3G or 4G phones can be used at the same time. So, what does that mean.
"The AT&T 3G MicroCell device acts like a mini cell tower in your home, and connects to your existing broadband Internet service. You receive improved cell signal performance for both voice calls and cellular data applications like picture messaging and Web surfing. Special Unlimited MicroCell calling features are also available." So, in other words.....I went from have 1 bar of service in very few uncomfortable spots or no service at all, to 4-5 bars of service. So, yes....that means no having to go out in the cold winter or hot hot summer to use the phone or send a voice mail. And definitely not scrunching up in a ball in the bottom of my spare bedroom closet.
Until Tuesday. My husband came home from work with the biggest smile on his face and a box in his hands.
After prying the box out of his hands, I found out that is was something called a MicroCell from AT&T.
So, of course I asked him what it was and how much it cost (since I have not been working we have been really trying to spend our money on only the essentials). After finding out that the gadget was $199, I immediately
So, are you curious about what the magic box does. Well, here it is. It connects to your broadband Internet service to create a strong, secure, sharable 3G signal in your home. Up to four AT&T 3G or 4G phones can be used at the same time. So, what does that mean.
"The AT&T 3G MicroCell device acts like a mini cell tower in your home, and connects to your existing broadband Internet service. You receive improved cell signal performance for both voice calls and cellular data applications like picture messaging and Web surfing. Special Unlimited MicroCell calling features are also available." So, in other words.....I went from have 1 bar of service in very few uncomfortable spots or no service at all, to 4-5 bars of service. So, yes....that means no having to go out in the cold winter or hot hot summer to use the phone or send a voice mail. And definitely not scrunching up in a ball in the bottom of my spare bedroom closet.
Monday, June 20, 2011
These Shorts Are Made For Walking
I had a minor break through on my laziness today! While going through my clothes, I found 14 pairs of khakis! Yes, 14 pairs. I had that many because at my last job I was a manager and we had to either wear khakis, black pants, or navy pants. So, my wardrobe consisted mainly of khakis. While going through them, I found a pair that I had purchased at the Goodwill. They were loose fitting on the legs and while wearing them at work I some how got a black marker mark on my tush. I was going to throw them away, when I started thinking of all the black shorts that I see and have been loving the last couple of months. So, I decided I would try to dye the pants and make them into shorts. Here is what the pants looked like before I started.
As you can see on the right leg, I started to cut the lower part of the pants off. I just wanted to have the least amount of fabric to dye. I would recommend wearing gloves when dying, but if you do not have gloves you can use a ziplock bag.
I made sure to follow the directions on the container of black dye. After letting the fabric soak in the dye for 30 minutes, I hand rinsed the shorts. Then to be on the safe side I washed the shorts and dried them.
This is what they looked like once dried.
I wanted my shorts to be about 5" long from the inseam. I plan on making them longer so I can hem and fold them over. I figured an extra 2" would be enough length....but it really wasn't. I would suggest that if anyone is going to try this they add 3" to the length they want.
I cut off any excess and then turned the shorts inside out and folded the shorts over about 1 1/2" and pinned it down.
Then I sewed a straight stitch as close as I could get to the edge.
At this point, I turned my iron on and needed it to warm up. So, while it was warming up, I decided to fix the awful pockets on these pants. They were all huge and the back pockets made me look like I had a lump of poo in my pants. Take a look at the photos to see how big these dreadful things were.
To fix them, I just sewed a straight stitch across the bottom. Then, I cut of the excess and did a zig zag stitch on the outside of that. Seen here.
After this, I ironed my pants and this is what I ended up with. I could have left it like this, but my stitching was awful because my bobbin thread was acting up on my first leg I sewed.
See, you can even see where I didn't sew all the way around on that side. So, it's a good thing I was planning on folding the bottoms up. Once I did that, I put a small stitch on each side seam to hold the fold up and two stitches in the front and two stitches in the back to also hold the fold up. I just made sure to not stitch through the top layer. That way, you can't see it. Then, I ironed the shorts again.
As you can see on the right leg, I started to cut the lower part of the pants off. I just wanted to have the least amount of fabric to dye. I would recommend wearing gloves when dying, but if you do not have gloves you can use a ziplock bag.
I made sure to follow the directions on the container of black dye. After letting the fabric soak in the dye for 30 minutes, I hand rinsed the shorts. Then to be on the safe side I washed the shorts and dried them.
This is what they looked like once dried.
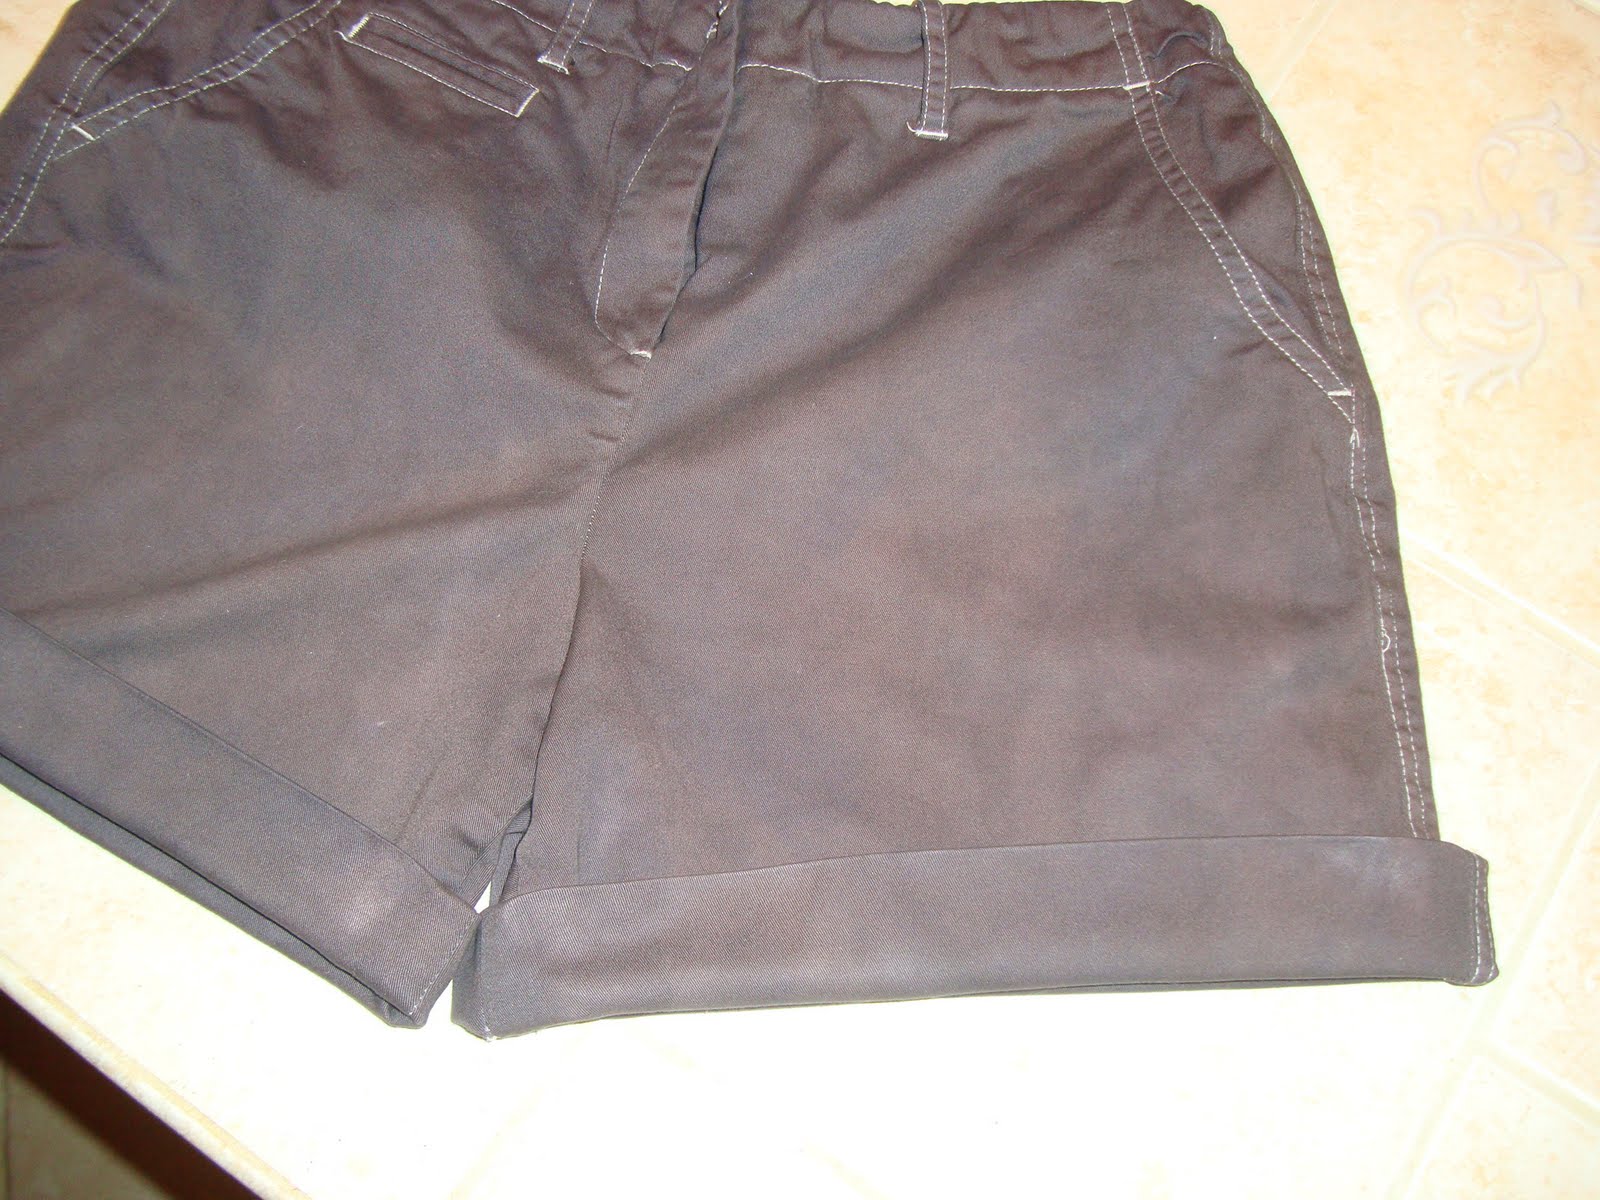
They came out brown! With a purplish tone...but mostly brown. |
I like that the stitching didn't dye. It made for a good contrast |
I wanted my shorts to be about 5" long from the inseam. I plan on making them longer so I can hem and fold them over. I figured an extra 2" would be enough length....but it really wasn't. I would suggest that if anyone is going to try this they add 3" to the length they want.
I cut off any excess and then turned the shorts inside out and folded the shorts over about 1 1/2" and pinned it down.
Then I sewed a straight stitch as close as I could get to the edge.
At this point, I turned my iron on and needed it to warm up. So, while it was warming up, I decided to fix the awful pockets on these pants. They were all huge and the back pockets made me look like I had a lump of poo in my pants. Take a look at the photos to see how big these dreadful things were.
One of the front pockets before fixing it. |
one of the back pockets before fixing it. |
my stitching is not pretty, but no one can see it. |
the back pocket. Now I won't look like I have a lump of poo in my pants. |
After this, I ironed my pants and this is what I ended up with. I could have left it like this, but my stitching was awful because my bobbin thread was acting up on my first leg I sewed.
See, you can even see where I didn't sew all the way around on that side. So, it's a good thing I was planning on folding the bottoms up. Once I did that, I put a small stitch on each side seam to hold the fold up and two stitches in the front and two stitches in the back to also hold the fold up. I just made sure to not stitch through the top layer. That way, you can't see it. Then, I ironed the shorts again.
Saturday, June 18, 2011
Mamamamoooo Cows Mamamamake Milk
I have been on a streak of laziness. I have a few projects that I have started on and I just can't seem to get motivated to finish them and post them. So, I decided to write about something that has plagued me for as long as I can remember.....Lactose intolerance. Yes everyone my name is Misty and I am lactose intolerant. I have lived a life of drinking skim milk with my cereal. Something my husband loves to make fun of me for. He refers to it as water. I can't remember when I have been able to drink chocolate or strawberry flavored milk! Oh just reminiscing of those days brings a tear to my eye.
For those of you who do not have a lactose intolerant problem. Let me just give you a very brief idea of some of the symptoms of being lactose intolerant. (I don't want to scare you off so I won't be too descriptive) In normal cases, one usually starts showing signs anywhere between 30 minutes to 2 hours after digesting something with the enzyme lactase in it. The symptoms are
The first time I tried it, I will not lie, it was a little too sweet for me in my plain Special K cereal. And it has a yellowish brown tint to it. But, when I drank it alone, all by itself, it was fantastic. And do you want to know the best part? No lactose intolerance! I decided after drinking the first carton that I would get the plain Almond Milk for my cereal, which actually tastes better than milk to me. The fantastic thing...they have chocolate Almond Milk! Which is fantastic.
Oh Oh, and guess what else. Here are some great stats.
Plain Almond Milk
* Percent Daily Values are based on a 2,000-calorie diet. Your daily values may be higher or lower depending on your calorie needs:
For those of you who do not have a lactose intolerant problem. Let me just give you a very brief idea of some of the symptoms of being lactose intolerant. (I don't want to scare you off so I won't be too descriptive) In normal cases, one usually starts showing signs anywhere between 30 minutes to 2 hours after digesting something with the enzyme lactase in it. The symptoms are
- abdominal bloating (not that big of a deal if this was the only thing there was)
- abdominal cramps (I'm talking about the ones that make you bend over almost)
- gas (yeah, here we go with the embarrassing parts)
- diarrhea (told you)
- naseau
The first time I tried it, I will not lie, it was a little too sweet for me in my plain Special K cereal. And it has a yellowish brown tint to it. But, when I drank it alone, all by itself, it was fantastic. And do you want to know the best part? No lactose intolerance! I decided after drinking the first carton that I would get the plain Almond Milk for my cereal, which actually tastes better than milk to me. The fantastic thing...they have chocolate Almond Milk! Which is fantastic.
Oh Oh, and guess what else. Here are some great stats.
Plain Almond Milk
- 60 Calories
- has 50% more Calcium than dairy milk
- has an excellent source of vitamin E
* Percent Daily Values are based on a 2,000-calorie diet. Your daily values may be higher or lower depending on your calorie needs:
- 60 calories
- calcium 45%
- vitamin D 25%
- vitamin E 50%
- vitamin B12 50%
- sugars 7g
- 137 calories
- vitamin D- none
- calcium 45%
- vitamin E- none
- vitamin B12 25%
- 18.8g
Thursday, June 16, 2011
Gardening requires lots of water - most of it in the form of perspiration. ~Lou Erickson
Still keeping in form with my original promise of not helping Louis with our garden (other than taking pictures and reaping the benefits), I went outside with him to take some pictures of him pulling up the potatoes he thought we dead. The plants were very sad and looked like the heat and sun had gotten to them. But, once we Louis dug them up, we found the potatoes were fine. Score! I love to eat potatoes, but I try not to eat them that often. Louis on the other hand loves potatoes and could eat them and chocolate and be the happiest man alive.
I am more excited for my peppers, cucumbers, cherry tomatoes, and most of all baby corn. Thanks to my dad, who ate salads all the time, I love veggies. I actually eat at least one salad a day. I sound so healthy don't I....yeah, not so much! My other meals usually are not as healthy.
Subscribe to:
Posts (Atom)